Hey all! I’m Lucas & World of Warcraft gamer from 2007-2011, I loved TBC and WotLK. Unfortunately, I deleted WoW in 2012 and never came back… Well, until today!
In this post, I will create a Private Server of World of Warcraft (3.3.5a) based on TrinityCore.
Time effort: 30-60 mins.
What is TrinityCore?

TrinityCore is an open-source project, it’s a tool that emulates the WoW Blizzard server.
You can download TrinityCore via the Github page : https://github.com/TrinityCore/TrinityCore
And yep, I’m planning to create a repack (server files) that will make it easy to set up your own server. It will make life easier.
My PC-Setup I use
I use my local hardware for the setup. It’s easier on Windows, but Linux is also supported. In this tutorial we will use Windows.
If you want to set up a server on Linux, check out this tutorial: https://trinitycore.info/install/requirements/linux
My hardware
- RTX 3080 GPU
- AMD Ryzen 7 5800X 8-Core CPU
- 32 GB RAM
You don’t need that much hardware power, but safe is safe.
Starting Setting up the Server
Creating a World of Warcraft (WoW) private server using TrinityCore requires a good understanding, databases & server management. Below is a basic outline of how you can set up a WoW private server using TrinityCore. Remember that running a private server for World of Warcraft is against Blizzard’s terms of service, and this tutorial is for educational purposes only.
Prerequisites
- Knowledge Requirements: Basic knowledge of SQL databases, command line operations
- Software Requirements:
- TrinityCore source code available here
- MySQL or MariaDB – for an easy setup we will use XAMPP
- A compatible WoW client. (here, patch 3.3.5a)
Download 3.3.5a here via Torrent - CMake (Download CMake here) and a C++ compiler like GCC or Visual Studio
- Git for source code management
- Boost ≥ 1.78 (latest stable recommended) – Download Boost here
MySQL ≥ 5.7 – I use Xampp – Download here
OpenSSL ≥ 1.1.x – Download OpenSSL here
MS Visual Studio (Community) ≥ 17.4 (2022) (Desktop) Important: do not use the preview version – and you’ll need the C++ Desktop Extension - HeidiSQL for database-management
- Hardware Requirements: A decently powerful computer for hosting the server. The specifications depend on the player load.
Setting up the Database
Install MySQL/MariaDB: Install a database management system like MySQL or MariaDB (remember, we use Xampp). Then, create a new database.
Start the MySQL service:

If it’s green and you see “Stop”, it’s started. Great! That means your database is now TURNED ON.
Download a database management tool: We’ll use HeidiSQL, as it is available completely for free.

Now, enter these details (these are the default values for XAMPP):
- Hostname: localhost (as the database is on your machine)
- User: root
- Password: keep this empty!
Press “CONNECT” (in my image: Öffnen – I’m german)… and you’ll see the database:

Now, we need to create a table for the World of Warcraft database, that our TrinityCore server will use. I’ll show you how that works:

Rightclick your database (see red arrow) and go to “Create new – database”. Name it trinitycore and press OK:

Should now look like this:

Now click trinitycore and your database is … empty. Nothing in it, yet. This will change later.
Install CMake and a C++ Compiler: These are required for building TrinityCore from source.
- Download and Install CMake:
- Visit the CMake download page and download the Windows installer.
- Run the downloaded installer.
- Follow the installation wizard instructions.
- Make sure to select “Add CMake to system PATH for all users” during the installation process.
- Download and Install Visual Studio:
- Visit the Visual Studio downloads page.
- Download the Visual Studio Community Edition installer.
- Run the installer.
- During installation, select the ‘Desktop development with C++’ workload.
- Make sure to select the optional components required for C++ development.
- Complete the installation process.
Download and Build TrinityCore
- Clone TrinityCore Repository:
- Open Command Prompt or PowerShell.
- Navigate to the directory where you want to clone the TrinityCore repository.
- Use the following command to clone the repository:
git clone https://github.com/TrinityCore/TrinityCore.git
Generate Build Files with CMake:
- Open Command Prompt or PowerShell.
- Navigate to the TrinityCore directory that you’ve just cloned.
- Create a new directory named ‘build’ within the TrinityCore directory. This is where the build files will be generated.
- Navigate into the ‘build’ directory.
- Run CMake to generate the build files. You’ll specify the Visual Studio generator
- Build TrinityCore:
- Open the generated solution file (
TrinityCore.sln) in Visual Studio. - Build the solution by selecting ‘Build’ > ‘Build Solution’ from the Visual Studio menu.
- Open the generated solution file (
With TrinityCore successfully built, you’re ready to configure and run your private server.
Download & Install Boost
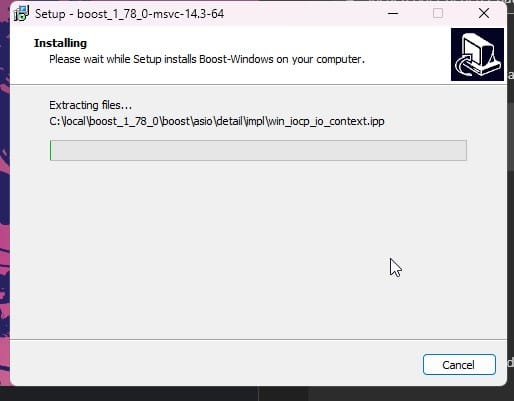
- Boost: Depending on your Boost version, you may require a newer version of CMake. Here’s an example: Boost 1.80 requires CMake 3.24.2 (with 3.24.1 it will display warnings).
- Download the prebuilt Windows Binary for Visual Studio 2022 (or higher).
- Here’s the link for the minimum version: 64bit Boost 1.78.0
- If you prefer a higher Boost version, check this link. Note that not all versions are currently supported by TrinityCore (minimum is 1.78) or CMake (e.g., CMake 3.24.1 will throw CMake errors with Boost 1.80).
- Install the package to the default location (usually
C:\local\boost_1_XX_0\). - Add an environment variable to the “System” variable named
BOOST_ROOTwith the value of your Boost installation directory, e.g.,C:/local/boost_1_73_0. It’s important to use “/”, not “” when pointing to the directory. Make sure that it does not have a trailing slash at the end of the path. If you encounter problems, add the same variable in the “USER” variables section as well.
- CMake:
- Download and install the Latest Release -windows-x86_64.msi file. NEVER download the RC (Release Candidate) versions.
- Select “Microsoft Visual Studio 2022” and do not select the Win32 platform.
MYSQL_ROOTwith the value of your MySQL installation directory, e.g.,c:/wamp/bin/mysql/mysql5.7.19. Remember to use “/”, not “” when pointing to the directory. (Using bundled MySQL servers is at your own risk and is not supported.)- MySQL development files:
- These files are typically shipped with MySQL Server. Search for them in the program files directory:
MySQL\MySQL Server 8.X\libandMySQL\MySQL Server 8.X\include.
- These files are typically shipped with MySQL Server. Search for them in the program files directory:
- OpenSSL:
- Download the 64-bit version. – here: https://slproweb.com/products/Win32OpenSSL.html
- Depending on the MySQL version you installed, select a compatible OpenSSL version
- For MySQL 8.0.34 and newer, use OpenSSL 3.
- For MySQL 8.0 to 8.0.33, use OpenSSL 1.1.1.
- Find the 64-bit version by locating the latest Win64 OpenSSL that is NOT the “light” version. For example: Win64 OpenSSL v3.1.2.
- While installing OpenSSL, choose “The OpenSSL binaries (/bin) directory” (NOT “The Windows system directory”) when given the choice on where to copy the OpenSSL DLLs. These DLLs will need to be located easily for Core Installation.
While installing OpenSSL, choose The OpenSSL binaries (/bin) directory (NOT “The Windows system directory”)
when given the choice on where to copy the OpenSSL DLLs. These DLLs will need to be located easily for Core Installation:

(Optional) If you use different PCs to compile/run Trinity, install one of the following packages on your Server-PC to avoid missing dependencies (depending on your Visual Studio Version and your Server-PC Operating System):
- Microsoft Visual C++ 2022 Redistributable Package.
Note: TrinityCore cannot be run on Windows XP, Windows Server 2003, or Windows Vista.
Windows Core Installation
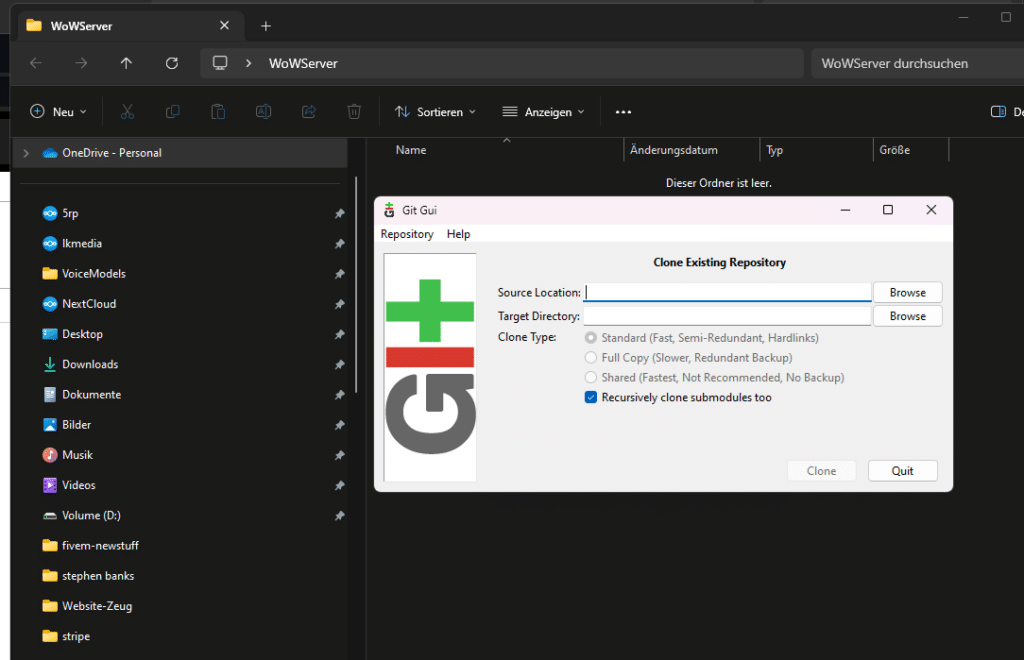
- Pulling the Source:
- Create a directory where Core files will be pulled, for example:
C:\Trinity. - Right-click on the directory and select Git Extensions -> Clone (or on recent versions: GitExt Clone…).
- Fill in the data as follows:
- For 3.3.5 (WotLK Client): This will clone the 3.3.5a branch, recommended for starters and those wanting playable content.
- For master (currently Dragonflight client): This will clone the master branch. Note that this is NOT recommended for starters as it doesn’t ship most content after 3.3.5a.
- Click Clone. Within a few minutes, all TrinityCore source files will be pulled into the directory
C:\Trinity.
- Create a directory where Core files will be pulled, for example:
- Configuring and generating Visual C++ solutions with CMake:
- Before you begin, create an empty directory called Build. In this example, we will use
C:\Build. - Click Browse Source… and select the source directory (
C:\Trinity). - Click Browse Build… and select the build directory (
C:\Build). - Click Configure.
- Make sure that “Use default native compilers” is checked (should be checked by default).
- In the drop-down menu, choose the version of the compiler you downloaded in the Software Required section. Be sure to choose the Win64 version if you’re working on 64-bit compilation.
- Click Finish.
- Make sure Tools is checked already. This will compile the map extractors needed later in the setup. In the master branch (up to 6.2.4 tag), this will also generate connection_patcher.exe.
- Click Configure again. As long as you have error(s) typed in red in the log window, you will have to check your parameters and click again on it.
- Click Generate. This will install the selected build files into your
C:\Buildfolder.
- Before you begin, create an empty directory called Build. In this example, we will use
- Compiling the Source:
- In Visual Studio, browse into your
C:\Buildfolder and openTrinityCore.slnwith Visual Studio Community. Alternatively, you can use the button [Open Project] in the CMake window to open the solution directly with VS. - On the menu at the top, click Build and select Configuration Manager.
- Set Active Solution Configuration to RelWithDebInfo.
- Right-click ALL_BUILD and select Build, or go to the Build menu and click Rebuild Solution (Ctrl+Alt+F7).
- If your GUI does not show Solution Explorer, click the Build menu and select Rebuild Solution.
- Compilation time varies from machine to machine, typically taking between 5 and 30 minutes.
- If you are asked to “Reload build files” during the compile, do so.
- When the build is complete, you will find a message similar to the one below (the numbers may be different):vbnetCopy code
========== Build: 22 succeeded, 0 failed, 0 up-to-date, 1 skipped ========== - Your freshly compiled binaries will be in the
C:\Build\bin\RelWithDebInfoorC:\Build\bin\Debugfolder. These are all used to run your server at the end of this instruction.
worldserver.conf.distandauthserver.conf.dist/bnetserver.conf.distfiles toworldserver.confandauthserver.conf/bnetserver.confrespectively, unless you want to keep the configuration files of a previously compiled version of the core. - In Visual Studio, browse into your
- Keeping the Source Up-to-Date:
- TrinityCore Developers are always at work fixing and adding new features to the core. You can always check them here, or by viewing them from within Git Extensions.
- Open your TrinityCore repository in GitExtensions.
- Click on the blue arrow.
- In the new window, click Pull. This will sync your local repo to the latest commits from the branch you have set up as default.
- Now you will need to re-run CMake Configure & Generate to update your solution (.SLN) files.
- Compile the downloaded source.
- Run worldserver; it will apply all new SQL files (you can see that in the console).
Creating the Map Files (with Tools)
- Now switch to the bin/RelWithDebInfo folder and you’ll find 4 exe files:
mapextractor.exe
mmaps_generator.exe
vmap4extractor.exe
vmap4assembler.exe
- Copy them to your WoW directory and run each of them. First mapsextractor.exe, then vmap4extractor.exe, then vmap4assembler.exe, then mmaps_generator.exe (this will take some time)
- Copy the generated folders to your server directory
How to become a GM / Admin
Follow these steps to establish your authority and create login accounts.
Server Initialization
Once you’ve completed all the necessary setup steps, it’s time to launch your server. Start by running the authserver (or bnetserver on the master) to kickstart your server. Keep in mind that the authserver allows you to log in with your username (email on master)/password to access the Realm Selection screen. Meanwhile, the worldserver facilitates connection to the realm itself. Once you’re in-game, you can safely close the authserver if you prefer no one else to connect to the server.
Important Note: Avoid creating accounts directly in your database unless you’re absolutely confident in your understanding of the process.
Creating Login Accounts
To create a login account, enter the GM command directly into the worldserver window using the syntax: account create (or bnetaccount create on master). Here’s an example syntax:
account create <user> <pass>
If you want to designate the account as a GM, follow up with:
account set gmlevel <user> 3 -1
In this command, $account represents the account name to be changed, #level denotes the GM level (ranging from 0 to 3, with 3 being the highest), and #realmid indicates the realm ID. Setting the GM level to “3” grants full GM access.
Step 3: Accessing GM Commands
Access the world database using your database management tool and locate the command table. This table provides a comprehensive list of GM commands, including their descriptions and the required security level (GM level) to use them. Make sure to keep your database up-to-date for the most accurate information. The security level of a command determines which GM levels can utilize it, along with all higher GM levels.
Step 4: Logging into the Server
Minimize your server windows and launch WoW. Avoid using the Launcher to launch WoW unless you’ve edited the realmlist.wtf file’s patchlist option. Log in using the account credentials you just created. You should see the Trinity realm available for selection. Log in, create a character, and you’re ready to roll!
Account Creation Examples:
Here are examples for both 3.3.5 and master:
- For 3.3.5:
- Create account:
account create <user> <pass> - Set GM level:
account set gmlevel <user> 3 -1
- Create account:
- For master:
- Create account:
bnetaccount create <user> <pass> - Set GM level:
account set gmlevel <user#realm> 3 -1
- Create account:
Note: The username used for setting GM level differs from the username created with bnetaccount. You must manually find the username in auth.account.username.


